")
To remove a tempered glass screen protector safely, start by warming the adhesive with a hairdryer on low for 15 seconds. Use your fingernail or a plastic credit card to gently lift one corner. Slowly slide the card underneath while keeping the protector at a low angle to prevent it from snapping. If the glass is cracked, apply clear tape over the surface first to hold the shards together. Once removed, clean any residue with a microfiber cloth and isopropyl alcohol.
But have you ever looked down at your phone after a long day in the bright Las Vegas sun only to realize that the spiderweb on your screen isn’t a cool wallpaper?
It is the heart-sinking moment when your iPhone or Android takes a tumble onto the hard pavement. But then you remember. You have a tempered glass protector on there. Relief washes over you because the protector probably took the hit for the actual screen.
However, now you are stuck with a jagged, splintered mess. You want to get it off, but you are terrified of scratching the pristine display underneath.
What if you make it worse?
What if the glass splinters into your thumb?
Stick with us. We are going to walk you through exactly how to remove a tempered glass screen protector without a single scratch or a trip to the emergency room.
The Science of Screen Protection: Why Do They Stick So Well?
Knowing how to remove a tempered glass screen protector requires understanding that the bond is chemical in nature. The silicone adhesive relies on a vacuum seal. To break it, you must introduce air slowly at one corner rather than prying it from the center, which can cause the glass to shatter.
Before you start pulling, you need to understand what you are dealing with. Tempered glass protectors are not just “glass.” They are a multi-layered sandwich of oleophobic coating, tempered glass, and a specialized silicone adhesive. In a high-heat environment like Las Vegas, that silicone can bond even tighter to your iPhone or Android screen over time.
Understanding Hardness and Adhesion
| Feature | Tempered Glass Protector | Factory Phone Screen |
| Material | Chemically strengthened glass | Gorilla Glass or Ceramic Shield |
| Hardness (Mohs) | Approximately 9H | Approximately 6 to 7 |
| Adhesive Type | Full glue silicone | N/A |
| Heat Resistance | High (but adhesive softens) | Extremely High |
Knowing how to remove a tempered glass screen protector requires understanding that the bond is chemical in nature. The silicone adhesive relies on a vacuum seal. To break it, you must introduce air slowly at one corner rather than prying it from the center, which can cause the glass to shatter.
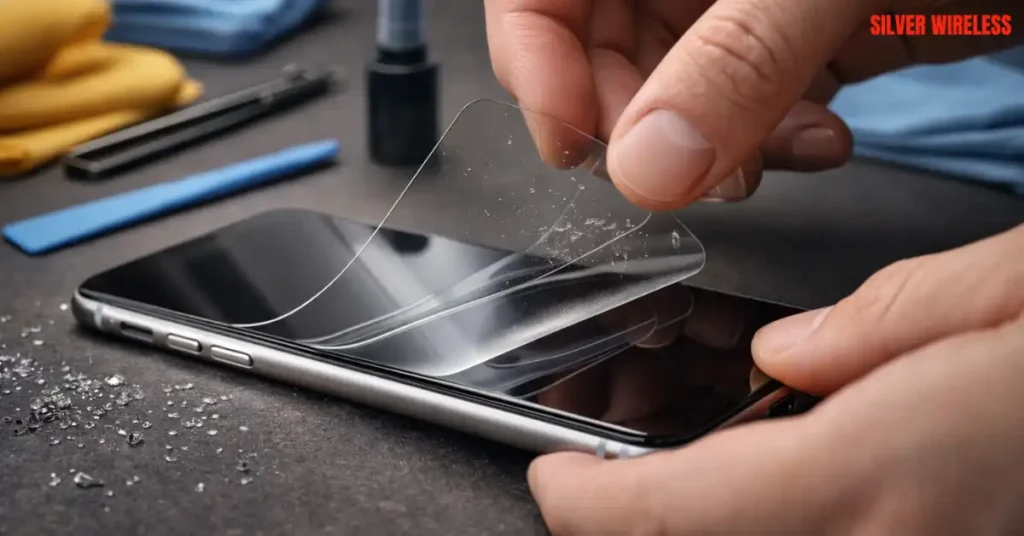
Step by Step: How to Take Off a Screen Protector Without Breaking It
To remove a screen protector without breaking it, start by lifting a corner with your fingernail or a thin plastic tool, such as a guitar pick. Peel it back slowly at a low angle to avoid flexing the glass. If the adhesive is stubborn, use a hairdryer on low heat to soften it. Once removed, clean any remaining residue with a microfiber cloth.
If your protector is still intact and you just want to swap it, follow this method.
The goal here is a clean lift.
1. The Low Heat Technique
The heat in Las Vegas is usually our enemy, but here, it is your friend.
- Use a hairdryer on the lowest setting for about 15 seconds.
- Wave it over the screen to warm the silicone.
- This expands the adhesive slightly and makes it much more pliable.
2. Finding the Entry Point
Use your fingernail to find the corner with the least “cling.”
- If your nails are short, use a thin plastic guitar pick or a credit card.
- Never use a metal blade or a screwdriver.
3. The Slow Slide
Once you have a tiny gap, slide your plastic card in.
- Do not lift upward yet.
- Slide the card horizontally along the top edge.
- This breaks the vacuum seal across the entire top of the phone.
Want a perfect, bubble-free installation after you remove the old one?
Visit Silver Wireless Cell Phone Repair for a Professional Fresh Start!
Our technicians have the specialized tools and dust-free environments to make your phone look brand new in minutes.
The Safety Protocol: How to Remove a Cracked Screen Protector
When learning how to remove a cracked screen protector, always use tape as a stabilizer. It ensures the shards remain attached to the protector’s backing and do not scratch the actual display glass during removal.
If your protector is already shattered, the process changes significantly.
A cracked protector is dangerous because the structural integrity is gone.
If you try to peel it, small glass “needles” can flake off and cut your fingers or get lodged in your phone’s ear speaker.
The Tape Method
This is the most important tip for safely removing a cracked screen protector.
- Take a piece of wide packing tape or Scotch tape.
- Cover the entire screen with the tape.
- Press it down so it bonds to every shard of the broken glass.
- Now, when you lift the corner, the tape holds the “puzzle pieces” together.
It prevents the protector from crumbling into a hundred tiny pieces as you pull.
DIY Success: How to Remove Tempered Glass From a Phone at Home
Removing tempered glass from a phone at home is simple if you avoid using metal tools. Household items like dental floss or plastic cards are softer than your phone’s screen, so you won’t leave permanent marks.
You do not need a professional lab to do this.
You just need patience and the right household items.
Your Home Tool Checklist
- Heat Source: Hairdryer (preferred) or a warm compress.
- Lifting Tool: Plastic card (credit card, library card) or a toothpick.
- Stabilizer: Clear tape (if cracked).
- Cleaner: 70 percent isopropyl alcohol and a microfiber cloth.
The Dental Floss Trick
If the credit card method isn’t working, try dental floss.
Tuck a piece of floss under a lifted corner and “saw” it back and forth under the glass.
This is often the safest way to remove tempered glass from a phone at home because it applies zero upward pressure on the screen.
Is your screen looking a bit dull or scratched? Drop by Silver Wireless on Charleston Blvd
We offer deep cleaning and premium screen protection services for all iPhone and Android models right here in Las Vegas. Get Directions to Silver Wireless!
Post Removal Care: Winning the Residue War
To finish removing a screen protector, you must remove the residue. Avoid using window cleaners or harsh chemicals, as they can strip the oleophobic (oil-repellent) coating from your original phone screen.
Once the glass is off, you aren’t done yet.
The silicone adhesive often leaves a sticky, hazy film.
In a dusty place like Las Vegas, this residue will attract lint and grit within minutes.
How to Clean Your Screen Safely
- Dab, Don’t Rub: Use a piece of tape to “dab” at any large chunks of glue.
- The Alcohol Wipe: Use a cloth dampened with 70 percent isopropyl alcohol.
- The Final Polish: Use a dry microfiber cloth in a circular motion until the glass shines.
Why Professional Help Matters in Las Vegas
The main reason to seek professional help for how to remove a tempered glass screen protector is the risk of “adhesive bonding.”
In high heat environments like Las Vegas, the bond can become stronger than the phone’s glass. A professional has the thermal tools to release this bond without overheating the internal battery or logic board.
While these DIY tips work for most, some situations require an expert touch.
Is your screen protector currently being held on by pure stubbornness?
If your protector has been on for 5 years or your phone has been exposed to extreme desert temperatures, the adhesive might have “baked” onto the glass. Our team at Silver Wireless has the experience to handle these high-risk removals. We see it every day.
A customer tries to remove tempered glass from a phone at home and accidentally pulls up a chunk of the actual digitizer.
According to industry data from Mark and Spark Solutions, screen-related issues accounted for nearly 50 percent of all smartphone repairs in 2025.
That is a lot of room for error. We use specialized chemical solvents that dissolve the glue without harming the delicate electronics inside your iPhone or Android.
Don’t risk your $1,200 smartphone over a $10 accessory.
If you feel any resistance or hear a cracking sound that isn’t the protector, stop what you are doing. Bring it to us. We are proud to be the trusted repair authority for the Las Vegas community. Whether you need a new protector, a battery swap, or a full screen repair, we are here to help.
Want to stay ahead of the game and keep your phone in top shape?
Check out Top 10 Most Common Phone Repairs in Las Vegas and How to Avoid Them in 2026 to see how simple maintenance can save you a fortune.
Visit Silver Wireless in Las Vegas Today!
Don’t let a simple DIY fix turn into an expensive screen replacement.
Let our certified experts handle it safely for you. See Our Full List of Services Here!
Frequently Asked Question
Ans- No, removing a tempered glass protector will not damage your phone’s original screen, as long as you use the correct tools. These protectors are bonded with a special silicone adhesive that is designed to be non-permanent. The only real risk to your iPhone or Android device comes from using sharp metal objects, like knives or razor blades, to pry the edge. If you stick to plastic cards, fingernails, and gentle heat, your factory glass will remain pristine and scratch-free.
Ans- Most glass screen protectors are surprisingly easy to remove if they are high-quality and haven’t been exposed to extreme conditions. The difficulty usually spikes when the protector has been on the device for more than two years or if the phone has spent significant time in the intense Las Vegas sun. Over time, the adhesive can become brittle or “baked” onto the glass. In these cases, a simple 15-second warming with a hairdryer is usually all it takes to make the removal effortless again.
Ans- You can technically peel it off, but doing so too quickly is a mistake. If you simply yank the glass upward, the tension can cause the tempered layer to snap into small, sharp fragments. Instead of a fast peel, you should focus on a slow, steady lift. By moving a plastic card underneath the glass as you lift, you distribute the pressure evenly and ensure the protector comes off in one clean piece without making a mess or risking a cut to your fingers.
Ans- If your protector feels like it is part of the phone, do not force it. This “stuck” feeling is common with UV glue protectors or devices that have been in high heat. Try applying warmth to the area for slightly longer, about 30 seconds, or use a tiny drop of 70 percent isopropyl alcohol at the very edge to help break the chemical bond. If it still won’t move, it is best to visit a professional. At Silver Wireless, we have specialized tools to safely release stubborn adhesives without stressing your display.
Ans- We generally do not recommend reusing a tempered glass protector. Once you lift the glass, the silicone adhesive begins to attract microscopic dust and lint from the air. Furthermore, the adhesive layer is often stretched or weakened during removal. If you try to reapply it, you will likely end up with permanent bubbles or corners that refuse to stay down. For the best protection and clarity, it is always better to start fresh with a new, high-quality protector.
Ans- Safety should be your first priority when learning how to remove a cracked screen protector. Even though tempered glass is designed to break into duller “chunks,” a shattered protector can still produce tiny, needle-like splinters. We always suggest wearing thin gloves or applying a layer of clear tape over the cracks before you begin. This keeps the glass contained and protects your hands from accidental nicks or glass dust.